 |
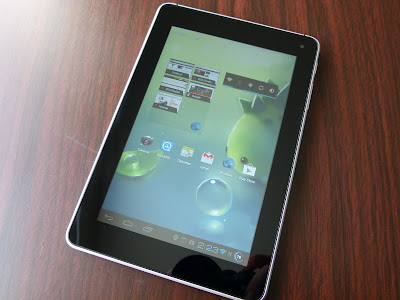
| The Huawei MediaPad, one of the most underrated 'Droids ever made |
...and here is the second rapid-fire Root 'guide' for the day. Like the guide for the AT&T SIII this isn't really so much a guide, as a pointer to where to find the Root method, because the method itself is so simple. In fact, I can safely say the MediaPad is the easiest to Root Android device I've ever used. So, if you own a MediaPad, and the thought of Rooting your Android device has always seemed tempting, but just too scary and difficult to try, then this might be just the thing you need to get your first taste.
For reference the T-Mobile Springboard is to all intents and purposes the same device, this guide will also work just as well for those of you packing the carrier-branded version of the MediaPad.
Here is what you'll need:
- A well charged MediaPad
- A microSD card
- One of either of these custom ROMs - take a little look at their threads and decide which looks the best for you - Osimood or HWMod
Once you've got those together you're virtually there, just do the following:
- Use the Huawei "AllBackup" app to back up your apps and data to the external SD card, since installing the Rooted-ROM will wipe your device (if you don't have anything you particularly need to retain post-flash, or you've just unboxed your MediaPad you can just skip this step)
- Extract the zip file the ROM came in, you'll find a folder called "dload"
- Copy that folder to the root directory of the SD card, insert the card into the MediaPad's card slot
- Restart the MediaPad and follow the onscreen instructions to install the ROM (Note: If the update doesn't start automatically at restart, then restart again and additionally press and hold the Volume+ button)
- When it is finished it will prompt you to remove the SD card or press the power button to exit the update utility and reboot the device - use the remove SD card option (everytime I've been in set-up, even including when it came fresh out of the box, it has crashed during set-up, and if the card is still in that will cause it to re-do the ROM install)
- While the SD card is removed delete the dload folder before putting it back in the device, that way if you do happen to get a random restart on your MediaPad you don't re-flash the ROM and wipe everything again (!)
Congrats, your MediaPad is Rooted.
Yes, it really was that simple.
Honestly, you're finished. All done here.
Are you still here?
Well, in that case let me recommend installing this custom kernel, which lets you do two great things for your MediaPad. Firstly, it allows you to overclock the MediaPad CPU cores to 1.5GHz, which gives performance a really nice bump (Sensation users, on the same SoC the MediaPad possesses, have demonstrated this is a very safe long term clock speed). It also fixes the difficult touch screen sensitivity of the MediaPad on its stock kernel, probably the most vexing fault on an otherwise excellent Android tablet.
[Notes: There is a more up to date version of the boot.img file out there, but it'll be a couple of days before I can get a download link for it - this version is perfectly functional though. Secondly here is the original thread at XDA, just be aware that the dev has now narrowed the kernels focus to CM9/AOSP builds for the MediaPad, so you shouldn't try and flash the downloads currently in the thread]
To install the kernel you're going to need to be able to use Fastboot, but that's a matter for another guide on another day (and hopefully another editor, if I can twist his arm hard enough). If you want to widen your Android-horizons in the meantime, why not make a start on some reading about Fastboot here, and here. You might even feel empowered enough to try it on your own!
Thanks Murray, I was meaning to do this on my MediaPad.
ReplyDeleteNo worries! Glad to be of service.
DeleteFinally got round to giving this a go, Murphys Law, the easiest root ever and the only one I cant get to work?? Does the SD card have to be blank apart from the dload folder? Do the contents of the dload folder need to be extracted to the SD card root directory?
ReplyDeleteThe SD card doesn't have to be blank, and you definitely don't want it extracted. The dload folder should just sit in the root directory of the SD external SD card. If the update doesn't start automatically at restart, then restart again and additionally keep pressing the Volume+ button (on the right).
DeleteOh, and I wouldn't bother loading the tablet up again, because once you're Rooted you're going to want to install the CM10 Jelly Bean build (will have a guide up very soon).
Delete:)
Ah ha there is the missing step, the Volume + button :) I assumed restart was simply power off and on.
ReplyDeleteFor both the MediaPads I've had a hand in Rooting all that was required was to power off... Will add it to the guide since it seems not all behave the same.
DeleteIs this about the Mediapad 10 FHD or some other older device?
ReplyDeleteHi, could you help me please, my MediaPad doesn't install the ROM when I turn it on, and if I press and hold the Volume + button, it enters into fastboot mode, and stays there.
ReplyDeleteWhat can I do?