 |
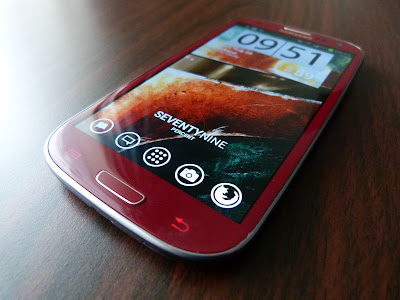
| Introducing the blogs AT&T Garnet Red Galaxy SIII |
This is the first of two rapid-fire Root guides we're going to push out today at the blog (the second being a brief guide for the Huawei MediaPad). I say brief because the methods for each device are so simple there really isn't much point in labouring a guide, we're just basically alerting you to the method that worked for us, since you may recall that you will never, ever, see a guide here at the blog that we haven't personally road-tested.
So, how did I come to have a US-variant SIII here in NZ?
Well, recently I had the opportunity (excuse?) to get my hands on one of the Garnet Red AT&T SIIIs, so I jumped at the chance to satisfy my gnawing curiosity about the how the S4-Krait based SIIIs would stand up to their international brethren (don't worry, a post about that is coming soon to help guide those of you in a position to choose between them). All of which is really only said to verify that I actually have one, and have personally used the Root method linked to below.
Before you rush to click the link to the Root method, you should familiarise yourself with our usual disclaimers at the beginning of this post. I say this not because we don't care if you have problems, it's just that our capacity to trouble shoot is limited, and you shouldn't have embarked on an adventure to Root your device unless you did your due diligence first and had some understanding of what you were up to. While we're in disclaimer mode. I should also be very clear that I only have an AT&T SIII, and have not tested the other models supported by this Root method (I see a number of Rogers users have used it without issues).
What you'll need to do is head to this thread at XDA, and download a Root Toolkit (or grab it here, or here). Simply install it and follow the very straightforward onscreen instructions, and you'll be Rooted in only a matter of minutes. For simplicities sake I'd recommend using the "allinone" option, which will also install CWM recovery and Busybox to your device.
Once you're done it is obviously advisable to head to the backup section of the Toolkit and make both Nandroid and EFS backups (you can even send those backups to your PC from within the Toolkit, just in case some mischief were to afflict your on-device storage, nice). If you have any issues with making a Nandroid backup from the Toolkit itself, simply boot into recovery and do it from there.
Lastly, you'll want to reset the flash counter (in case you're going to need to return to stock via Odin for warranty purposes). For that you just need to grab Triangle Away from Chainfire. Simples.
Finally, all that is left to do is make a donation to mskip, the developer of the Toolkit, and make a suitably gushing thank you post to his thread.
No comments:
Post a Comment